


Whether you're looking to get creative or teach your little artists some new ways to work with crayons, we've pulled together 10 crayon techniques.
Crayon shading
We’ve probably all shaded with crayons before, but what’s the best shading crayon technique? Try shading using tonal values in your next creative session. Press lightly for a light tone, add more pressure for a medium tone, or use firmer pressure to create a dark tone. This technique will give you nicer blends without too much white paper showing through. Plus, it’s a great way to add tones to your artworks or in monochrome works.
Gradient
Gradients are great tools to use in landscapes for realistic skies, grass, or even in animals and portraiture works. For the gradient crayon technique, start with a dark colour, before adding a lighter tone each time, to gradually lighten the first colour. For a seamless blend, try to stick to similar colour families like blues, yellows, and greens and to colour in the same direction.
Layering
Though crayons can be waxy, there is a way to layer crayon colours nicely. An optical blend is where the colours appear to be blended together by the eye and it’s a great crayon technique to have in your back pocket. Place a primary colour down first, then layer a secondary colour, before finishing with a third. Where the colours overlap is where the secondary colours meet. This layering technique will give you a nice optical blend.
Directional lines
Looking to add some texture to your artworks? Or are you feeling like your crayon works are lacking movement or harmony? We’ve got it, try using directional lines. Create a line in one direction, then add more crayon lines following the same direction. Experiment with line length and width and see what you come up with.
Hatching
Like drawing, hatching can be used to add shadow or give your objects a sense of depth and weight to them. This is a great way to create more realistic crayon artworks and with enough practice, it’s pretty easy to master. For hatching, add parallel lines close together for darker tones. Or if you’re looking for a lighter tone, space the lines further apart.
Crosshatching
Mastered hatching? Let’s try crosshatching! Like hatching, begin with one direction of lines, then add another direction on top. Try vertical, horizontal or diagonal lines for an even overlap. Space these lines together for darker shadows or further apart for lighter tones.
Scumbling
Scumbling easily adds energy and texture to your art. It’s not just a crayon technique, it can also be used for mindful creating as a stress reliever, and we can all use a bit of self-care every now and then. For scumbling, use a circular motion, then add squiggles on top of one another. Experiment with different sized squiggles and vary the pressure for lighter or darker effects.
Stippling
Stippling or pointillism isn’t just good to add a bit of variety here and there, but you can also use this to add a subtle optical blend to your art. For stippling, use firm pressure to add dots or dashes with the point of the crayon. Try using similar colours next to one another or try pointillism with a crayon and use complementary colours for an optical blend.
Crayon wax resist
You’ll want to put those waxy crayons to good use with this technique. For a crayon wax resist, grab some dry paper and draw with a crayon. Add a light watercolour wash over the top, then leave to dry. The water will resist the wax and leave the crayon exposed. This crayon technique is great for adding patterns and textures to your artworks. Mastered it already? Experiment with different colours or with a white crayon for a contrasting effect.
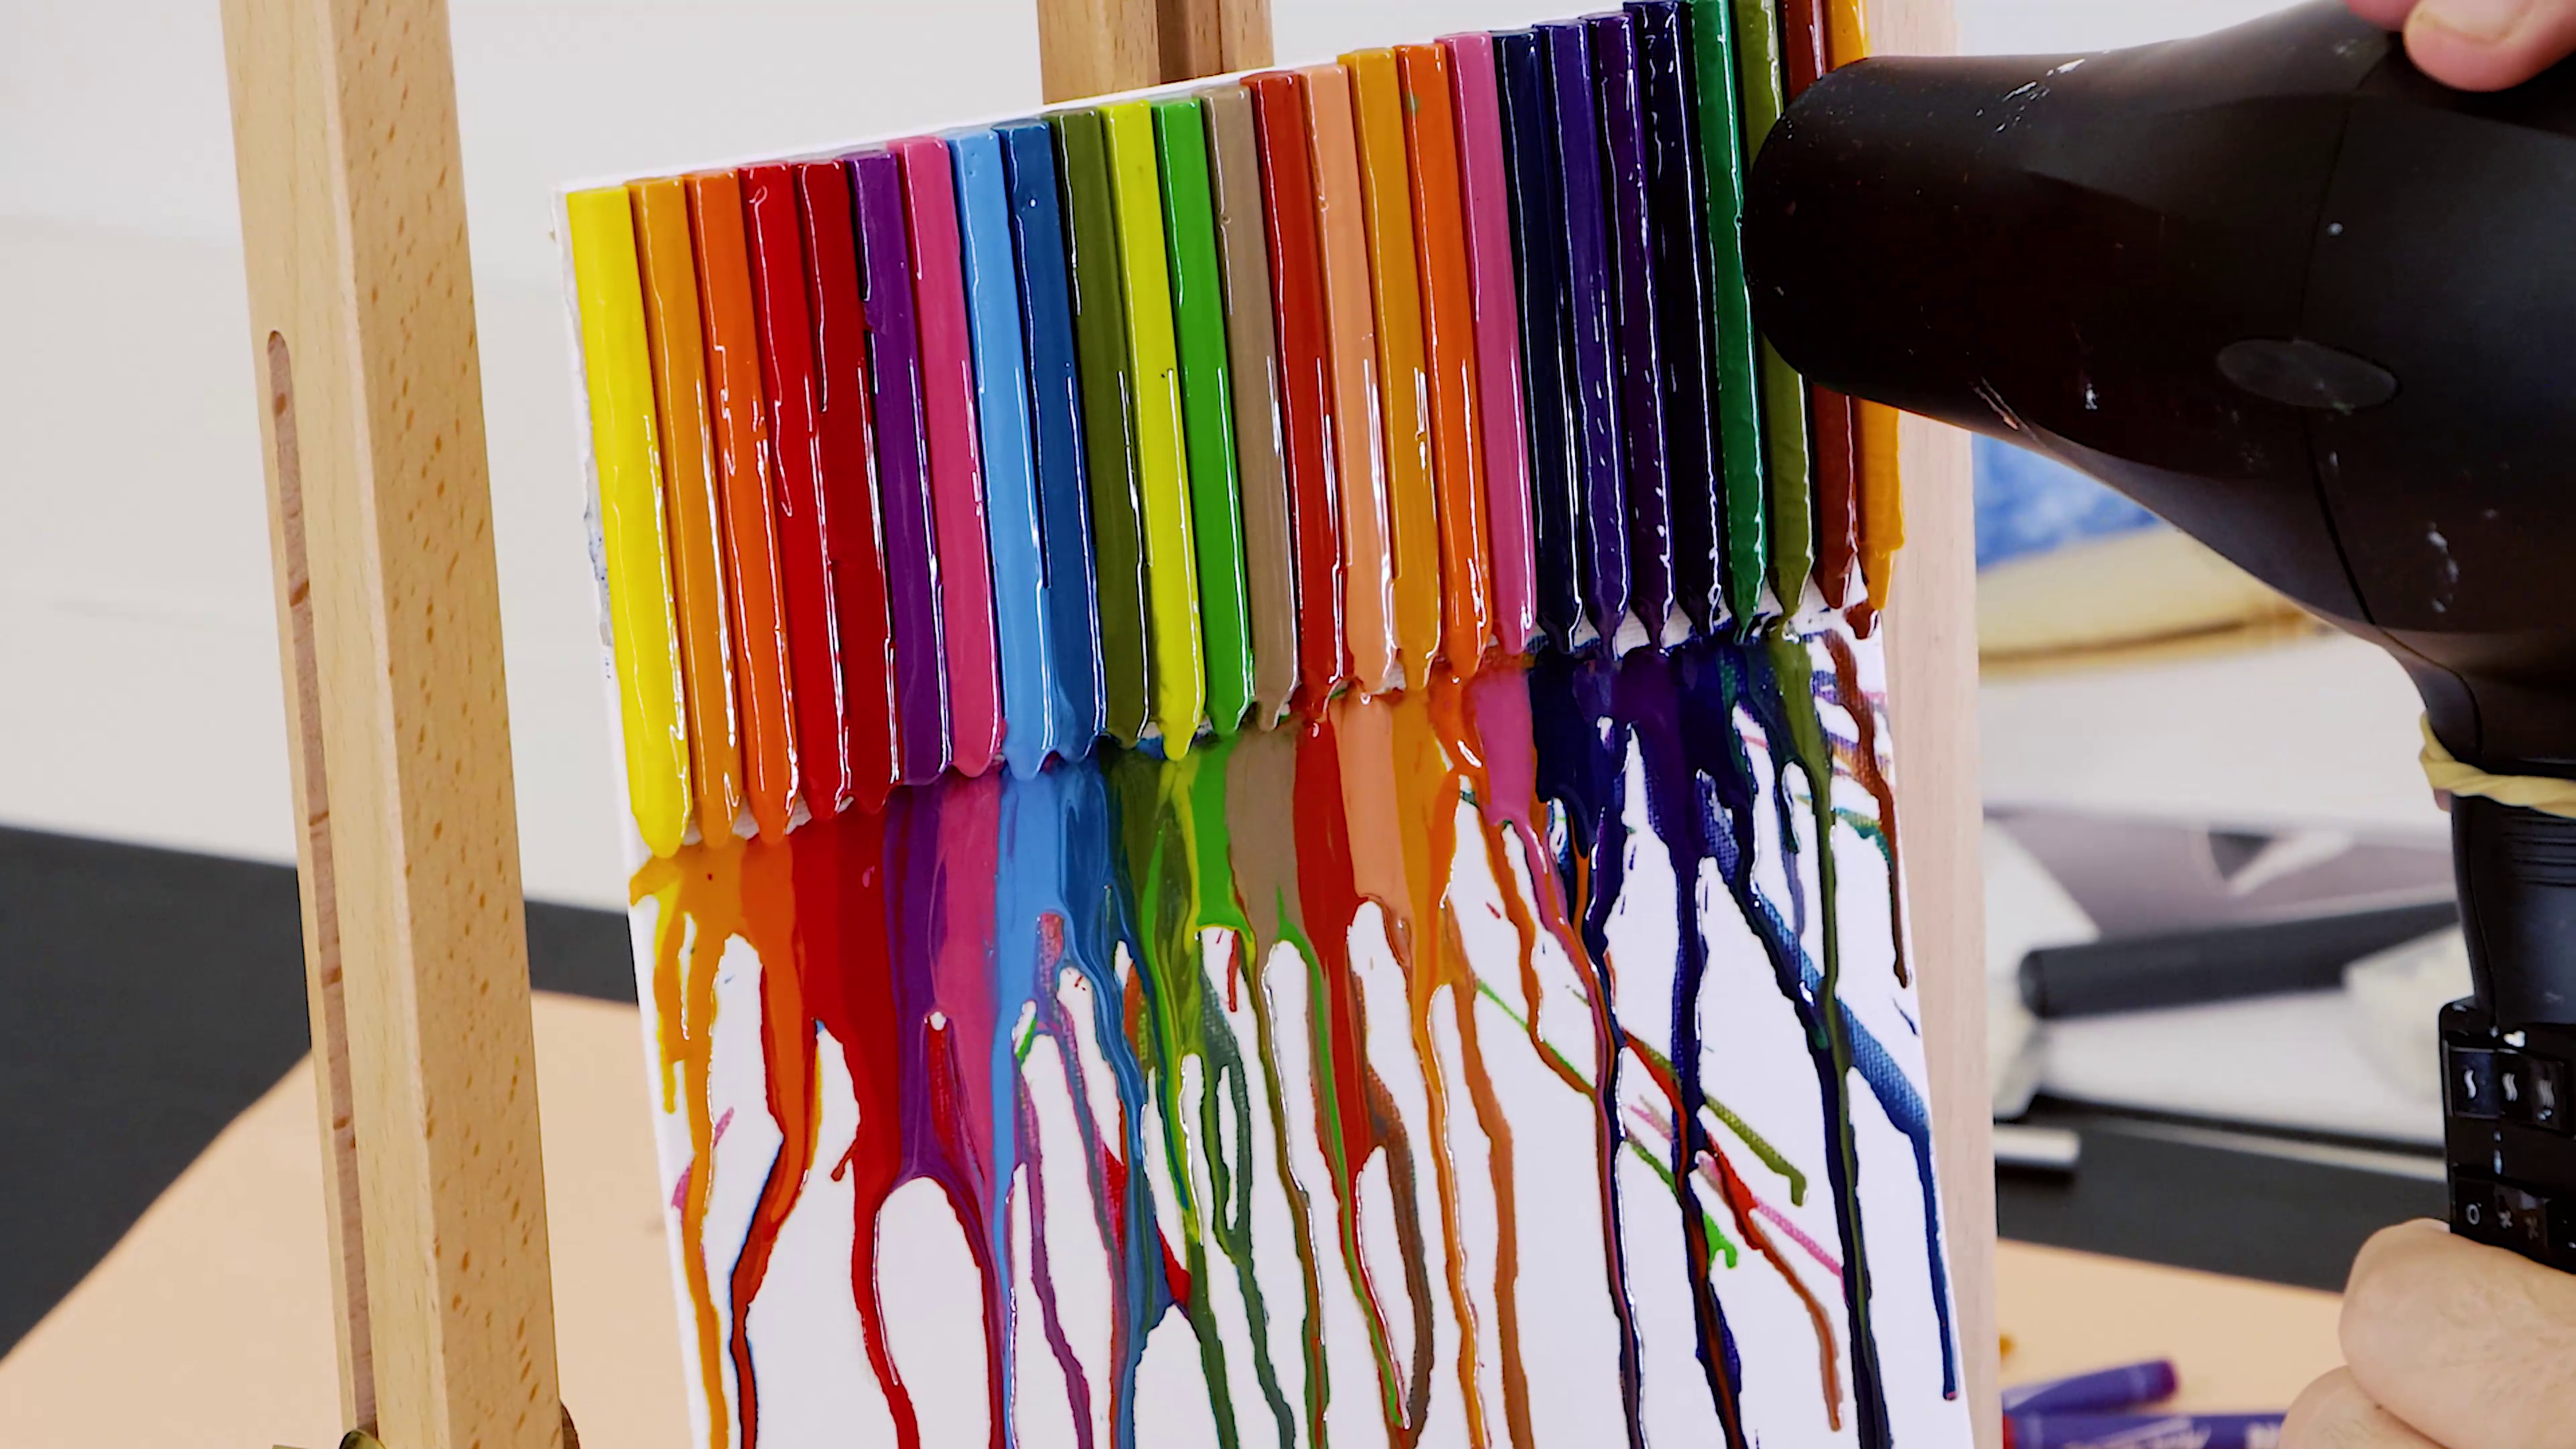
Melting crayons
Whether you paint with them or use them to create expressive drip art, melting crayons is a great crayon technique to try the next time you’re looking to get creative.
There are a few ways to melt crayons and you can use a hair dryer or melt them in a microwave.
For the microwave, you’ll need to remove all paper labels first. Then, use a knife to cut the crayon into small pieces. Place the pieces in a microwave-safe bowl and heat the colours one at a time. You’ll need to keep the microwave on a low to medium heat and supervise the microwave at all times. Heat for a maximum of 2 minutes and stir every 30 seconds (all microwaves are different, so use this as a rough guide). You can now paint with the wet crayon for a mixed media effect.
You can also melt crayons with a hair dryer. Again, remove all paper labels first, then place colours of a similar tone next to one another. Secure the crayons to a canvas with heat-safe glue. Then, use the heat from the hair dryer to blow the colours down the canvas. Keeping colours in a similar tone will stop your colours from muddying, so try using cool tones, warm tones or a rainbow effect for abstract crayon art.
Feeling confident? Browse our crayon range here or read through more of our techniques.
We hope that you feel inspired to re-create a few of these techniques in your next artwork. Try them for yourself and #montmarteart or tag us @montmarteart on Instagram or Facebook, we’d love to see what you create.